Android Built-in Animation

Reference to Android Animations

http://developer.android.com/training/animation/index.html

  • Displaying card flip animations
  • Animation layout change
  • Using ViewPager for screen slides
  • Crossfading two views
  • Zooming a view

Tutorial: Fade-in/Rotate/Zoom/Shake/Move guidelines

  • Under resources create Animator folder. Each XML will contain a separate animation.
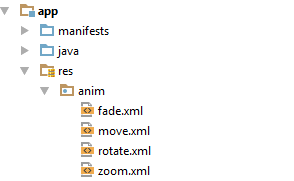
anim

Fade.XML
<?xml version=”1.0″ encoding=”utf-8″?>
<alpha xmlns:android=”http://schemas.android.com/apk/res/android&#8221;
android:interpolator=”@android:anim/accelerate_interpolator”
android:fromAlpha=”0.0
android:toAlpha=”1.0
android:duration=”3000” >
</alpha>
Move.XML
<?xml version=”1.0″ encoding=”utf-8″?>
<set xmlns:android=”http://schemas.android.com/apk/res/android&#8221;
android:interpolator=”@android:anim/accelerate_interpolator” >
<translate xmlns:android=”http://schemas.android.com/apk/res/android&#8221;
android:fromXDelta=”-75%p”
android:toXDelta=”75%p”
android:duration=”2000″ >
</translate>
<translate xmlns:android=”http://schemas.android.com/apk/res/android&#8221;
android:startOffset=”800″
android:fromXDelta=”75%p”
android:toXDelta=”-75%p”
android:duration=”2000″ >
</translate>
</set>
Rotate.XML
<?xml version=”1.0″ encoding=”utf-8″?>
<set xmlns:android=”http://schemas.android.com/apk/res/android”&gt;
<rotate xmlns:android=”http://schemas.android.com/apk/res/android&#8221;
android:fromDegrees=”0″
android:toDegrees=”360″
android:pivotX=”50%”
android:pivotY=”50%”
android:duration=”1000″ >
</rotate>
<rotate xmlns:android=”http://schemas.android.com/apk/res/android&#8221;
android:startOffset=”1500″
android:fromDegrees=”360″
android:toDegrees=”0″
android:pivotX=”50%”
android:pivotY=”50%”
android:duration=”1000″ >
</rotate>
</set>
Zoom.XML
<?xml version=”1.0″ encoding=”utf-8″?>
<set xmlns:android=”http://schemas.android.com/apk/res/android”&gt;
<scale xmlns:android=”http://schemas.android.com/apk/res/android&#8221;
android:fromXScale=”0.5″
android:toXScale=”2.5″
android:fromYScale=”0.5″
android:toYScale=”2.5″
android:duration=”3000″
android:pivotX=”50%”
android:pivotY=”50%” >
</scale>
<scale xmlns:android=”http://schemas.android.com/apk/res/android&#8221;
android:startOffset=”5000″
android:fromXScale=”2.5″
android:toXScale=”0.5″
android:fromYScale=”2.5″
android:toYScale=”0.5″
android:duration=”3000″
android:pivotX=”50%”
android:pivotY=”50%” >
</scale>
</set>
Shake.XML
<?xml version=”1.0″ encoding=”utf-8″?>
<rotate xmlns:android=”http://schemas.android.com/apk/res/android&#8221;
android:duration=”100″
android:fromDegrees=”-5″
android:pivotX=”50%”
android:pivotY=”50%”
android:repeatCount=”10″
android:repeatMode=”reverse”
android:toDegrees=”5″ />

  • In order to execute the animation apply it like this (i.e. fade, zoom):

Animation animationFade = AnimationUtils.loadAnimation(getApplicationContext(), R.anim.fade);  mytext.startAnimation(animationFade);
Animation animationZoom = AnimationUtils.loadAnimation(getApplicationContext(), R.anim.zoom);
myimage.startAnimation(animation)Zoom;

  • In order to have an event related to the animation (here on move) you need to set a listener. If you implement on this make sure your class implements AnimationListener :
animation = AnimationUtils.loadAnimation(getApplicationContext(), R.anim.move);
animation.setAnimationListener(this);
@Override
public void onAnimationEnd(Animation an) {
    // when animation ends
    if (an == animation) {
        Toast.makeText(getApplicationContext(),"Animation Stopped"        ,Toast.LENGTH_SHORT).show();}
}
@Override
public void onAnimationRepeat(Animation an) {
    // if the animation repeats
    if (an == animation) {
        Toast.makeText(getApplicationContext(),"Animation Repeated"        ,Toast.LENGTH_SHORT).show();}
}
@Override
public void onAnimationStart(Animation an) {
    // when the animation is started
    if (an == animation) {
        Toast.makeText(getApplicationContext(),"Animation Started"
        ,Toast.LENGTH_SHORT).show();}
}


InstallShield tips

  • Read\Write registry from script

Read:

export prototype MyMethod(HWND);

function MyMethod(hMSI)
STRING szUninstallKey;
STRING szKey, szName, svValue, szMsg, strOurVersion;
STRING szNumName, szNumValue, svNumValue, TITLE, svTargetVer, szPropertyValue;
INT nvType, nvSize, nType, nSize, numSize, nResult;
begin

REGDB_OPTIONS = REGDB_OPTIONS | REGDB_OPTION_WOW64_64KEY;
RegDBSetDefaultRoot(HKEY_LOCAL_MACHINE) ;
RegDBGetKeyValueEx(szKey, szName, nvType, svValue, nvSize);

// Retrieve key value information.
if (RegDBGetKeyValueEx (“SOFTWARE\\MyCompany\\App”, “ProductVersion”, nvType, svNumValue,
nvSize) < 0) then
MessageBox(“Cannot read from registry”, SEVERE);
abort;
elseif (svNumValue != “2.18.509”) then
MessageBox(“Only support 2.18.509.”, SEVERE);
abort;
endif;
end;

Write:

REGDB_OPTIONS = REGDB_OPTIONS | REGDB_OPTION_WOW64_64KEY;
RegDBSetDefaultRoot(HKEY_LOCAL_MACHINE) ;
RegDBCreateKeyEx( “SOFTWARE\\CRYPTOCard\\OWA”, “AllowXFrame” );
RegDBSetKeyValueEx( “SOFTWARE\\CRYPTOCard\\OWA”, “AllowXFrame”, REGDB_STRING, “1”, -1);

  • Stopping upgrade flag
  1. Go to Media > Upgrades
  2. Right window > Upgrade windows installer setup
  3. Most right window choose Disable
  4. This does not stop all upgrades!!! therefor see next section
  • Running custom action only on upgrade
  1. Create a custom command
  2. Install UI sequence = After find related products.
    Install UI condition = IS_MAJOR_UPGRADE OR IS_MINOR_UPGRADE
  3. In the function name enter MyMethod (see above)

if your custom action should block the upgrade choose Error custrom action and without script command only conditions

  • Changing files permission
  1. In General Information do not change the lock-down permissions to Custom!!! this makes tons of errors!!! stay with Traditional
  2. On Files and Folders right click your destination folder
  3. Choose permissions
  4. Give Administrators full permissions
  5. Give [USERSGROUP_AUTHENTICATED_USERS] limited permissions
  6. Give [USERGROUP_NETWORK_SERVICE] limited permissions
  • Adding checkbox for readme  at the end of a successfull installation
  1. Goto dialog SetupCompleteSuccess
  2. Create checkbox named CheckLaunchReadme
  3. Call its property LAUNCHREADME
  4. in the install-script add:
    • export prototype ShowReadme(HWND);
      function ShowReadme(hMSI)
      begin
      LaunchApplication( INSTALLDIR ^ “Configuration.html”, “”, “”, SW_SHOWDEFAULT, 0, LAAW_OPTION_NOWAIT | LAAW_OPTION_USE_SHELLEXECUTE );
      end;
  5. Add custom action : ShowReadme

C# Embedding Manifest

In order to embed  the  manifest you need to :

  • Add the manifest into your solution. if you don’t have “Application Manifest File” items in “Add New Item” (visual studio issue), then simply create a text file named app.manifest and choose “Add Existing Item” into your solution (best to drag it under the Properties folder in your Solution Explorer)
  • Click on the app.manifest in your solution explorer, right-click for properties. in the Build Action choose Embedded Resource

Took me 2 hours to find this workaround!!!!


Android Small Tips

Modifying application icon

  • in the manifest under application modify the android:icon=”@drawable/myicon”

Modifying background

  • in the layout, goto first layout (i.e. Relativelayout)  modify the android:background=”@drawable/mybgpic”

Adding click

  • Your class should implements View.OnClickListener
     public class MainActivity extends 
      AppCompatActivity implements View.OnClickListener
  • Update the onCreate
    @Override
    protected void onCreate(Bundle savedInstanceState) {
      myBtn= (Button)findViewById(R.id.Btn);
      myBtn.setOnClickListener(this);
    ... }
  • Update/create the onClick
    @Override
    public void onClick(View v) {
        if (v.getId() == R.id.Btn)
        {
            // click action
        } ... }

Removing title

  • in the manifest find the current theme used:
    android:theme="@style/AppTheme",
    goto its definition in styles.xml and add:
    <item name="windowNoTitle">true</item>

Setting background color on element

  • android:background="@android:color/black"

Modifying Image source (bitmap)

  • myImageView.setBackgroundResource(R.drawable.pic1);

Modify Activity Title

  • In the AndroidManifest.xml
    <activity
        android:name=".MyActivity"
        android:label="The new title"
        ...
    </activity>

Making application only horizontal (no rotate)

  • <application
        ...
        android:screenOrientation="portrait"...>

Start intent

  • Intent myIntent = new Intent(this, MyActivity.class);
    startActivity(myIntent);

Use weight (instead of width) to cover device width

  • <LinearLayout
        android:id="@+id/layout2"
        android:layout_width="fill_parent"
        android:layout_height="wrap_content"
        android:layout_gravity="top">
        <ImageButton
            android:layout_width="0dp"
            android:layout_weight="1"
            android:layout_height="200dp"
            android:background="@drawable/pic11"/>
        <ImageButton
            android:layout_width="0dp"
            android:layout_weight="1"
            android:layout_height="200dp"
            android:background="@drawable/pic11"/>
    </LinearLayout>

Placing LinearLayout below LinearLayout

  • <RelativeLayout
                android:layout_width="fill_parent"
                android:layout_height="wrap_content"
                android:orientation="vertical" >
                <LinearLayout
                    android:id="@+id/layout1"
                    android:layout_width="wrap_content"
                    android:layout_height="wrap_content"
                    android:layout_gravity="top">
                </LinearLayout>
                <LinearLayout
                    android:layout_width="match_parent"
                    android:layout_height="wrap_content"
                    android:layout_below="+@id/layout1">
               </LinearLayout>
        </RelativeLayout>

Using scroll view – can only scroll one item! (also horizontalscrollview. only difference will be the layout orientation => horizontal)

  • <ScrollView
        android:layout_width="match_parent"
        android:layout_height="wrap_content">
    <RelativeLayout
        android:layout_width="fill_parent"
        android:layout_height="wrap_content"
        android:orientation="vertical" >
        <LinearLayout
            android:id="@+id/layout2"
            android:layout_width="fill_parent"
            android:layout_height="wrap_content"
            android:layout_gravity="top">
            <ImageButton
                android:layout_width="0dp"
                android:layout_weight="1"
                android:layout_height="200dp"
                android:background="@drawable/pic1"/>
            <ImageButton
                android:layout_width="0dp"
                android:layout_weight="1"
                android:layout_height="200dp"
                android:background="@drawable/pic2"/>
        </LinearLayout>
        <LinearLayout
            android:id="@+id/layout3"
            android:layout_width="fill_parent"
            android:layout_height="wrap_content"
            android:layout_below="@+id/layout2">
            <ImageButton
                android:layout_width="0dp"
                android:layout_weight="1"
                android:layout_height="200dp"
                android:background="@drawable/pic3"/>
            <ImageButton
                android:layout_width="0dp"
                android:layout_weight="1"
                android:layout_height="200dp"
                android:background="@drawable/pic4"/>
        </LinearLayout>
        ...
    </RelativeLayout>
    </ScrollView>

Setting up Android Studio

Step 1: download the android studio

http://developer.android.com/sdk/index.html

Step 2: download a JAVA sdk

use the link in the installer, or:

http://www.oracle.com/technetwork/java/javaee/downloads/java-ee-sdk-7-downloads-1956236.html

Step 3: Intel visualization (Android Emulator)

Tools > Android > SDK Manager > Android SDK > SDK Updates Sites > Intel HAXM
Tools > Android > SDK Manager > Android SDK > SDK Tools > Intel x86 Emulator Accelerator (HAXM installer), rev 6.0.1
Download haxm-windows_v6_0_1 and executeYou will be prompted with an error regarding process visualization not enabled. Restart your computer and Enable the Intel virtualization technology: http://stackoverflow.com/questions/21635504/error-during-installing-haxm-vt-x-not-working

bqZDl